Published September 3, 2026 · By RestoFlo
Direct answer: Tile, grout and caulk are visible finishes, but they are not the complete shower waterproofing system. Before tile is installed, the shower needs a compatible assembly that manages water continuously across the walls, floor, corners, curb or curbless transition, niches, penetrations and drain connection. The selected membrane, backer, mortar, drain and sealants must be approved to work together and installed to the manufacturer’s instructions and applicable local code.
A finished shower can look perfect while the most important work is already hidden. Large-format porcelain, designer grout and new fixtures cannot compensate for a missing membrane, poorly detailed corner or incompatible drain connection.
The Tile Council of North America (TCNA) states plainly that grout joints are not waterproof. In a wet area such as a shower, adjoining areas must be protected by the installation method and substrate—not by assuming the finish surface will stop every drop.[1]
That makes the pre-tile inspection one of the highest-leverage moments in a bathroom remodel. Once tile covers the assembly, correcting a waterproofing defect may require removing finished work. This guide explains what homeowners should ask to see before tile, without prescribing one proprietary system or replacing the contractor, designer, manufacturer or local building official.
What should be behind shower tile?
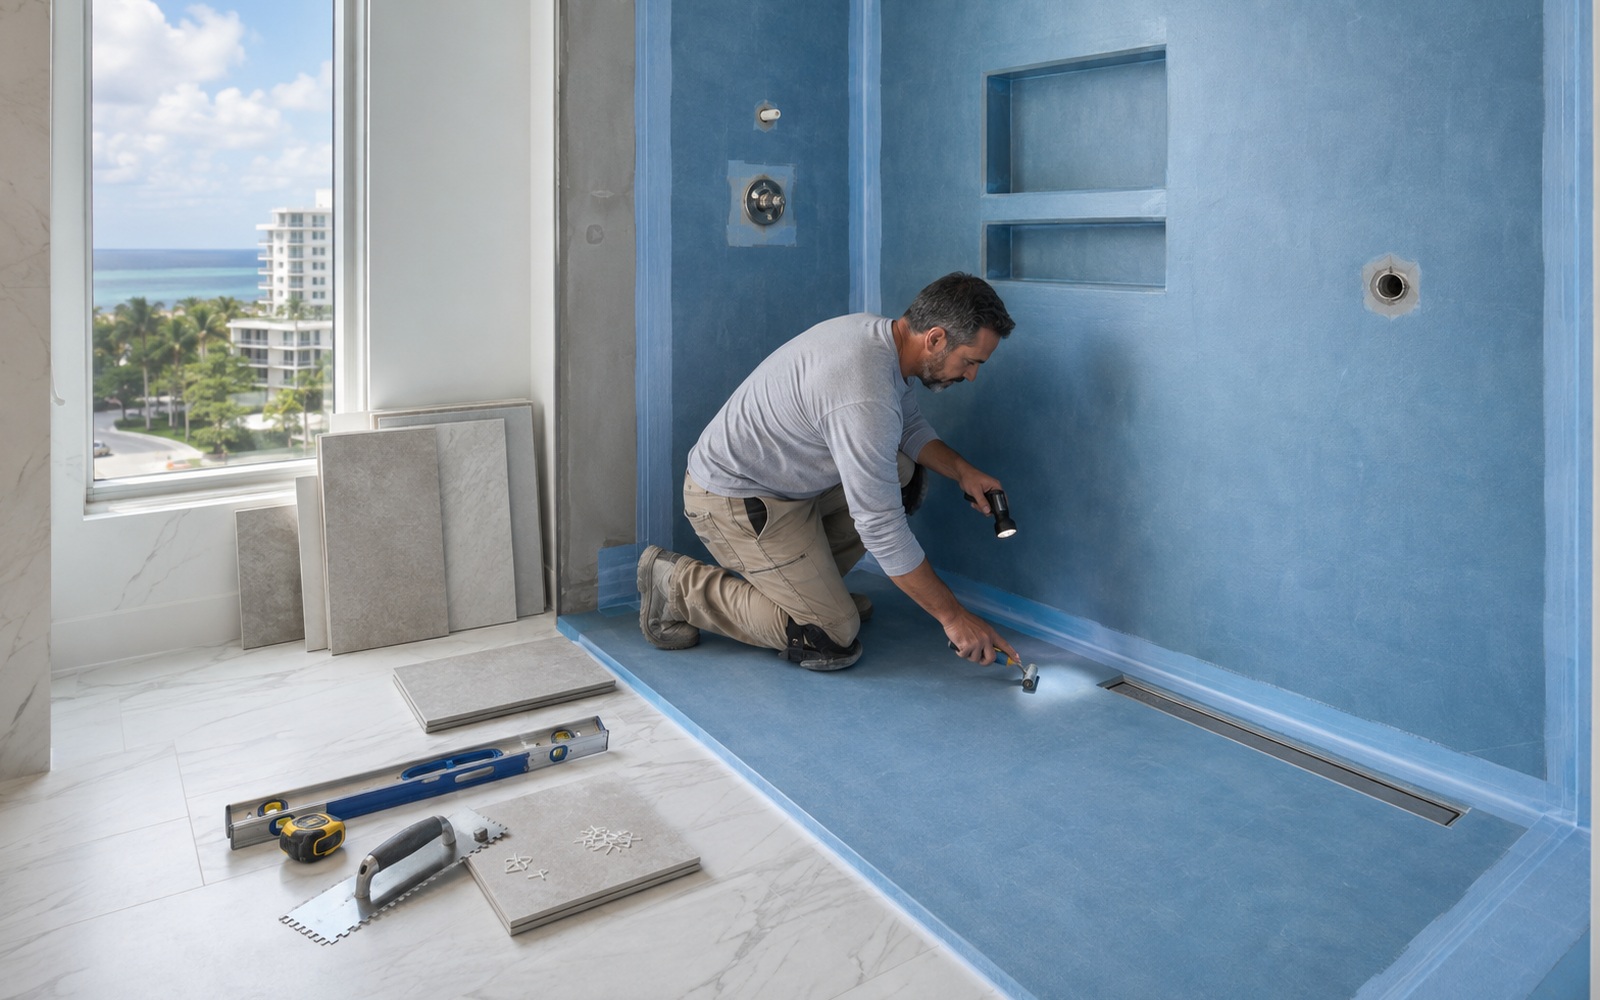
A properly planned shower is a connected water-management assembly, not a shopping list of unrelated products. Depending on the approved method, it may include:
- a suitable wall and floor substrate;
- a sheet-applied or liquid-applied waterproof membrane, or another approved shower system;
- reinforced or otherwise detailed seams, changes of plane and corners;
- compatible treatment around valves, shower arms, body sprays and other penetrations;
- a receptor or shower base that directs water toward the drain;
- a compatible drain or bonding flange connection;
- approved treatment at the curb, threshold or curbless transition;
- properly detailed niches, benches and ledges;
- mortar, sealant, fasteners and accessories allowed by the selected system; and
- required testing or inspection before tile conceals the work.
The exact layers vary. Some methods place a membrane directly behind the tile. Other traditional assemblies manage water deeper in the receptor or wall system. The homeowner’s goal is not to combine every product marketed as “waterproof.” It is to confirm that the contractor selected one coherent, documented method and followed its limitations.
TCNA notes that even the suitability of drywall behind certain surface-applied membranes depends on agreement among the membrane manufacturer, backer manufacturer, design professional and local code requirements. Some combinations are promoted; others are not. “It is covered by membrane” is therefore not enough by itself.[2]
Why tile, grout and caulk are not the waterproofing plan
Tile is the durable finish
Porcelain and ceramic tile can tolerate routine wetting, but the tiled surface contains joints, edges, penetrations and changes of plane. Water management must continue behind or beneath that surface according to the chosen method.
Grout fills joints
Grout helps finish the tile field and supports the edges of adjoining tiles, but TCNA cautions that grout joints are not waterproof.[1] Sealing grout may affect staining or maintenance depending on the product; it does not create a substitute shower membrane.
Flexible sealant handles movement locations
Compatible sealant is commonly used at specified changes of plane, transitions or penetrations. It can be an important detail, but a bead of caulk on the room side cannot repair a discontinuous membrane hidden behind tile.
Planning rule: Ask, “Where does water go if it passes the finish surface?” The answer should trace a continuous path to the drain without relying on vulnerable framing, paper-faced materials, cabinetry or the room outside the shower.
The seven details to inspect before tile
1. The selected system and approved substrate
Ask the contractor to identify the installation method, membrane product, backer, drain, mortar and sealants. Product data should show that the components are permitted together for the intended shower.
Look for one coordinated specification rather than improvised brand mixing. Manufacturer instructions may address substrate preparation, primer, membrane thickness or overlap, cure time, fasteners, acceptable sealants and flood testing. Conditions on site can change which instructions apply.
2. Full membrane coverage
A surface-applied system should cover the required wet area continuously. TCNA’s shower guidance says the waterproof membrane in the referenced methods must cover the solid backing under the entire area to be tiled.[2]
Check the full height and width called for by the design and product instructions, not only the area immediately around the valve. Look for skipped strips, pinholes, thin areas, unsealed fasteners or damage caused by later trade work. With liquid-applied products, visual color alone may not prove the required dry-film thickness; the installer should follow the manufacturer’s coverage and application requirements.
3. Corners and changes of plane
Inside corners, outside corners, wall-to-floor junctions, curb corners and threshold transitions concentrate movement and installation complexity. These areas should be detailed with the approved banding, preformed pieces, reinforcement or liquid-membrane method for the selected system.
A tidy flat wall does not prove that a three-dimensional curb corner is sealed. Ask to see these details before they disappear behind tile.
4. Niches, benches and horizontal surfaces
A niche creates multiple corners and penetrates the wall plane. A bench adds horizontal surfaces and connections to walls and floors. Each surface should be integrated into the waterproofing assembly and configured to direct water toward the shower—not into the wall.
The same principle applies to ledges and window returns inside a wet area. A decorative feature should not interrupt the drainage path.
5. Valves, pipes and fastener penetrations
The shower valve, shower arm, handheld outlet, body sprays and accessories create openings through the assembly. The selected system should provide a documented way to seal or manage each penetration.
Do not assume the decorative trim plate is the waterproofing. Ask what seals the assembly at the membrane plane and whether the detail remains serviceable.
Fasteners matter too. The system instructions should govern where mechanical fasteners are allowed and how they are treated. Later installation of doors, grab bars or accessories should not puncture the assembly casually.
6. Slope and drain connection
Water needs a deliberate path to the drain. The receptor, waterproofing and drain must connect as one assembly. A flat or back-pitched ledge, bench or floor can retain water even if the membrane itself is continuous.
For a curbless shower, the planning extends beyond the shower footprint. Floor recess, structural conditions, drain location, finished elevations, splash control and the bathroom transition should be resolved before framing and tile. A curbless look is not achieved safely by simply eliminating the curb from a conventional design.
7. Testing, documentation and inspection
Ask which test or inspection is required or recommended for the selected system and local jurisdiction. Where a flood test is applicable, it should occur after the receptor and drain connection are ready but before tile conceals the result. Some assemblies or locations may require a different verification method.
Record the product names, lot or batch information when practical, dated pre-tile photos, drain detail, corners, penetrations and the test or inspection result. Documentation does not guarantee future performance, but it creates a clearer record of what was installed.
A pre-tile homeowner checklist
Before tile installation begins, confirm that you can answer these questions:
- What exact shower method or system is being used?
- Are the backer, membrane, drain, mortar and sealant approved to work together?
- Does the membrane cover the full required wet area?
- Are inside corners, outside corners and wall-to-floor changes detailed?
- Are niches, benches, ledges and curbs integrated into the assembly?
- Are valves, pipes, fasteners and future accessories addressed?
- Does the shower floor and every horizontal wet-area surface direct water toward the drain?
- Is the drain connection visible and complete?
- Is a flood test, inspection or manufacturer-specific verification required?
- Have pre-tile photos and product records been saved?
- Are local permit and inspection requirements confirmed?
- Has the tile installer accepted the waterproofed surface before covering it?
If any answer is “we will fix it with grout,” pause and ask for the documented installation method.
Common shower-waterproofing mistakes
Treating moisture-resistant board as the entire system
A backer may be approved for a particular assembly, but the name “moisture resistant” does not establish that the completed shower is waterproof. Compatibility and installation method control the decision.
Combining incompatible products
Using membrane from one system, a drain from another and an unlisted sealant can create unclear interfaces. Mixing is not automatically wrong, but the installer should have written approval or a recognized method for every connection.
Missing membrane thickness or overlap requirements
Sheet seams and liquid-applied coatings depend on specific overlaps, coverage, reinforcement or cured thickness. “Two coats” is not a universal specification because application rate and product instructions differ.
Puncturing the curb or horizontal surfaces
Door tracks, glass hardware, temporary bracing or accessory fasteners can compromise a completed assembly. Penetrations should be planned and detailed according to the system—not drilled first and sealed as an afterthought.
Building a niche without continuous corner treatment
A niche has a back, sides, top, sill and wall connection. Waterproofing only the visible back panel leaves the difficult interfaces unresolved.
Assuming a fan fixes a shower-assembly leak
Ventilation is important for room humidity, but it does not correct liquid water moving through a failed shower assembly. ENERGY STAR notes that hot, humid air from baths and showers can increase indoor humidity and that properly performing bathroom exhaust fans should vent directly outdoors.[3] Waterproofing and ventilation solve different moisture paths; a durable bathroom needs both.
Covering the work before verification
Once tile is installed, a photo cannot be recreated and many details cannot be inspected without removal. Build the pre-tile review into the schedule rather than requesting it after the tile crew arrives.
Why South Florida conditions deserve extra planning
South Florida’s warm, humid conditions can reduce the margin for error when moisture reaches vulnerable materials or remains trapped. The U.S. Environmental Protection Agency’s moisture-control guidance says successful buildings must limit routine wetting, keep vulnerable materials from getting wet and allow damp materials to dry quickly when wetting occurs.[4]
EPA also identifies paper-faced gypsum board, medium-density fiberboard and oriented strand board among materials that can be vulnerable to moisture damage, while noting that bathrooms are among the areas likely to experience leaks and spills.[4] This does not mean every one of those materials is prohibited in every location. It means the chosen assembly should keep vulnerable materials outside unintended water paths and follow the applicable product and code requirements.
Humidity control remains separate from bulk-water control. EPA recommends keeping indoor humidity below 60 percent where possible and using bathroom exhaust ventilation; ENERGY STAR emphasizes fans that exhaust to the outdoors.[3][5] During a remodel, verify that the fan is actually ducted outside, appropriately selected for the room and installed so its rated airflow can be delivered. Do not vent shower moisture into an attic or another concealed space.
How to compare bathroom-remodeling proposals
A useful proposal should identify more than tile allowance and fixture brands. Compare these scope elements:
| Proposal item | What to look for |
|---|
| Demolition and assessment | What will be opened, protected and inspected; how concealed damage is handled |
| Substrate | Exact wall and floor backer or base; preparation and repair assumptions |
| Waterproofing method | Product/system, coverage area, seams, corners, penetrations and cure requirements |
| Drain and receptor | Drain type, slope approach, curb or curbless transition and compatibility |
| Niches and benches | Quantity, location, slope and waterproof integration |
| Verification | Required inspection, flood test or manufacturer-specific check; photo documentation |
| Tile installation | Tile type/size, mortar, joint plan, movement accommodation and finish details |
| Ventilation | Existing fan assessment, exterior termination and any proposed replacement |
| Permits and trades | Who handles plumbing, electrical, structural or permit-dependent work |
| Change orders | How hidden conditions, owner selections and scope changes are priced and approved |
The lowest proposal may not be the lowest price for the same shower if it omits a membrane system, drain detail, test, ventilation work or permitted trade coordination. Ask each contractor to price the same documented scope.
What if demolition reveals prior water damage or mold?
Stop and define the condition before covering it. Staining, deteriorated board, softened wood, corrosion, odor or visible growth can indicate that the remodel has crossed into assessment or restoration work.
Do not conceal wet or damaged materials behind a new waterproof assembly. EPA says moisture control is the key to mold control and advises fixing the water problem and drying wet areas promptly.[5] The appropriate response depends on the material, extent, water source, accessibility and applicable professional or regulatory requirements.
RestoFlo’s remodeling and restoration capabilities can be useful in this transition, but the scopes should remain clear. Existing damage assessment, remediation or drying should be documented separately from the planned bathroom upgrade. Do not represent a visual observation as a laboratory, structural, plumbing or medical conclusion.
When to call RestoFlo
If you are planning a South Florida bathroom remodel, RestoFlo can help assess the existing space, define a coordinated scope and discuss waterproofing, ventilation, tile, accessibility and finish decisions before work is covered. Learn more about bathroom remodeling.
If demolition reveals an active leak, wet materials or suspected mold, the next step may require leak detection, water damage restoration or mold remediation before rebuilding continues.
Call (754) 289-4815 or request a free assessment through RestoFlo.com. Final methods, permits, inspections and product selections depend on the property, existing construction, manufacturer requirements and local authority.
Frequently asked questions
1. Is tile grout waterproof in a shower?
No. TCNA states that grout joints are not waterproof. The shower must rely on the approved installation method and substrate to protect adjoining areas. Grout is part of the finish; it is not a substitute for a continuous waterproofing assembly.[1]
2. Does sealing grout make a shower waterproof?
No. A grout sealer may affect stain resistance or maintenance for a compatible grout, but it does not create the membrane, corner, penetration, receptor or drain connection required behind the finish. Follow the grout and shower-system manufacturers’ instructions.
3. Can waterproof membrane be installed over drywall in a shower?
Sometimes a manufacturer may permit a specific membrane and drywall combination, while another manufacturer or local code interpretation may not. TCNA says the membrane and backer manufacturers, design professional and local code official should determine suitability. Do not assume every membrane makes every substrate acceptable.[2]
4. Should a shower be flood-tested before tile?
A flood test may be required or recommended for many shower receptors, but the exact procedure depends on the system and local requirements. Confirm the method, timing, duration and drain protection with the contractor, manufacturer and building official. Complete the applicable verification before tile conceals the assembly.
5. Is a bathroom exhaust fan part of shower waterproofing?
It is part of moisture management, but not the shower’s liquid-water barrier. A fan that exhausts outdoors helps remove humid air from bathing. It cannot repair a failed membrane, drain connection or penetration. Waterproofing and ventilation should be planned as separate, coordinated systems.[3]
6. What photos should I take before shower tile is installed?
Photograph every wall, the full floor and drain, inside and outside corners, curb or curbless transition, niches, benches, valves, pipe penetrations and product labels. Add wide views that show location and close-ups that show detail. Save any flood-test or inspection record with the final contract and product information.
Sources
[1] https://tcnatile.com/resource-center/faq/ceramic-tile/ — Tile Council of North America — Ceramic Tile FAQ [2] https://tcnatile.com/resource-center/faq/showers/ — Tile Council of North America — Showers FAQ [3] https://www.energystar.gov/newhomes/features-benefits/indoor-air-quality-features — ENERGY STAR — Indoor Air Quality Features [4] https://www.epa.gov/sites/default/files/2014-08/documents/moisture-control.pdf — U.S. EPA — Moisture Control Guidance for Building Design, Construction and Maintenance [5] https://www.epa.gov/mold/brief-guide-mold-moisture-and-your-home — U.S. EPA — A Brief Guide to Mold, Moisture and Your Home